Rio Doce basin - Priority areas for restoration

Rio Doce basin - Priority areas for restoration

Part of the project Priority areas for environmental restoration of the Rio Doce basin.

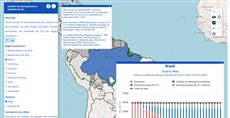
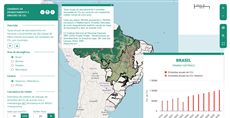
The map from Identification of priority areas for environmental restoration of the Rio Doce basin gathers the project’s results for the basin: priority areas for water supply sources (mananciais), an environmental and a social vulnerability index, the land’s suitability (“vocação”) for natural regeneration, for planting without an economic purpose and for planting with one, and the matching priority maps for each of these three ways of restoring vegetation. Base maps give the basin limit, its municipalities and its drainage network. Turn layers on and off, read the value under the cursor, and click the map to identify what lies there. Query 184 is under 1 KB: it shows how far plain layer definitions and the map address go before any widget or function is needed.

How it is built

  • Two groups. “Mapas base” and “Resultados” are each written as title, color and elements. See the layer and group model.
  • Layers by name only. Each layer is a published map (CSR:...); its title, legend and styles come from the map server, not from the query.
  • Order and start state. priority (100 down to 45) fixes the order in the panel, and visibility: true turns on the basin limit and the environmental vulnerability index at start.
  • Tools from the address. tools=...getfeature,hovershowlegend adds the identify button and the legend value under the pointer, and options=scale,startopened,capabilities adds a scale bar, opens the layer panel and loads only the maps the query names. See map toolbar tools and page options.

Try this

  • Turn on the three “vocação” layers one after the other and compare them with the priority maps.
  • Hover over the social vulnerability index to read its value under the pointer.
Reference: the parameters used here

Generated from the platform source. Every entry, searchable, is in the API reference; the raw data is api.json. Open an entry for its description, parameters and example; # links to it.

Group properties

GroupProperties3 entries
Keys of a group object, written next to its elements: title or viewTitle, color, openGroup, defaultProperties...

color

String= string.emptyproperty# Defines the Color of the group.

Defines the Color of the group. This is the Color of the Title and some elements inside the sub menu on the top of the screen.

[
   {
      title: 'My orange group',
      color: '#FFA500',
   },
]

elements

Array.<Layers>= Array.emptyproperty# Defines the Layers that will be part of the Group.

Defines the Layers that will be part of the Group. Each Layer can have multiple maps inside it. All maps inside a Layer will be shown together when that Layer is enabled. Besides that, all information about those maps can be used to calculate a new one using custom functions that can be writen in JavaScript.

[
  {
     title: 'A group with Layers!',
     color: '#FFA500',
     elements: [
        // Define your Layers here
     ],
  },
]

See also To learn more about Layers and it’s properties, check their documentation at: Layer Section.

title

String= string.emptyproperty# Defines the Title of the group.

Defines the Title of the group. The Title is shown at the sub menu on the top of the screen.

[
   {
     title: 'My new group!',
   },
]

Layer properties

LayersProperties3 entries
Keys of a layer object: which map it shows (name, source, styles), how it looks (title, opacity, visibility) and how its row and panel behave.

name

String= string.emptyproperty# Defines the maps that will be a part of the Layer.

Defines the maps that will be a part of the Layer. Every map defined in here will be shown when the Layer is active. Besides that, all of their information can be used to calculate a new map combining their data. In this website you will find some of the maps that can be used: http://maps.csr.ufmg.br/geonetwork/srv/por/search. You can find their name at the section "Visão geral do mapa" under its image. Those maps have the prefix "CSR:" before their names. Maps can also be uploaded by you. For that, you just need to define the 'source' property as 'file'.

[
  {
     title: 'A Group with two maps',
     color: '#FFA500',
     elements: [
        {
           title: 'This Layer has two maps!',
           // Each map is separated by commas
           // The first map is CSR:rios_principais that have the rivers of Brazil
           // The second map is CSR:estados that show the states of Brazil
           name: 'CSR:rios_principais,CSR:estados_cf',
           visibility: true,
        },
     ],
  },
]

priority

Number= 0property# Defines the order of which map will be rendered on top of the others.

Defines the order of which map will be rendered on top of the others. Layers with higher 'priority' will always be rendered on top of the layers with lower 'priority'.

[
  {
     title: 'At the bottom will be the geology, then the states and at top the rivers',
     color: '#FFA500',
     elements: [
        {
           title: 'Map of the states in Brazil',
           name: 'CSR:estados',
           source: 'local',
           priority: 2,
           visibility: true,
        },
        {
           title: 'Map of the rivers in Brazil',
           name: 'CSR:rios_principais',
           source: 'local',
           priority: 3,
           visibility: true,
        },
        {
           title: 'Map of the geology in Brazil',
           name: 'CSR:geologia',
           source: 'local',
           priority: 1,
           visibility: true,
        },
     ],
  },
]

visibility

Boolean= falseproperty# Define if the Layer should start visible or not.

Define if the Layer should start visible or not. Set it to 'true' for the Layer start visible. Otherwise, set it to 'false' and the Layer will start hidden.

[
 {
   title: 'Example of visibility in a Layer',
   color: '#666699',
   elements: [
     {
       title: 'This layer will start visible',
       name: 'CSR:geologia',
       source: 'local',
       visibility: true,
     },
   ],
 },
]

Link parameters (?name=value)

URLProperties3 entries
Parameters of the link that opens a saved map: ?queryid=123&lang=eng&tools=...&options=... tools and options take the lists below.

options

string= string.emptylink parameter# Allows the user to set some configurations when the map loads, like displaying a scale, how many Layers will start visible, etc…

Written as ?options=

Allows the user to set some configurations when the map loads, like displaying a scale, how many Layers will start visible, etc…

// Example of query in visualization mode
https://maps.csr.ufmg.br/calculator/?queryid=<query_id>&options=<options_list>
// Example of query in edit mode
https://maps.csr.ufmg.br/editor/?queryid=<query_id>&options=<options_list>

See also To learn more about the Options available and how to set them up, check their documentation at: URL Options Section.

tools

string= 'All tools available'link parameter# Define which tools will be available for the user to interact with the map.

Written as ?tools=

Define which tools will be available for the user to interact with the map. Every tool listed here will be available for the user. If left empty, Mappia will display all tools for the user.

// Example of query in visualization mode
https://maps.csr.ufmg.br/calculator/?queryid=<query_id>&tools=<tools_list>
// Example of query in edit mode
https://maps.csr.ufmg.br/editor/?queryid=<query_id>&tools=<tools_list>

See also To learn more about the Tools available and how to set them up, check their documentation at: URL Tools Section.

visiblelayers

Number|String= customlink parameter# How many layers start visible.

Written as ?visiblelayers=

How many layers start visible. When the parameter is present it overrides the 'visibility' of every layer: all layers start hidden, then this many are turned on, counted in query order.

  • A positive number N: the first N layers of the query start visible.

  • A negative number -N: the last N layers start visible.

  • 0: no layer starts visible.

  • custom: the same as leaving the parameter out: each layer's own 'visibility' decides.

Leaving it out (the default) lets each layer's 'visibility' decide; options=onlyfirstvisible is the same as visiblelayers=1. Any other text, null included, hides every layer.

// Example of query in visualization mode
// If the Layer has 3 Layers in the order: Layer1, Layer2 and Layer3,
// By setting 'visibelayers=2', the FIRST two Layers will start visible
// That is, the Layer1 and Layer2 will start visible
https://maps.csr.ufmg.br/calculator/?queryid=<query_id>&visiblelayers=2
// Example of query in edit mode
// If the Layer has 3 Layers in the order: Layer1, Layer2 and Layer3
// By setting 'visiblelayers=-2', the LAST two Layers will start visible
// That is, the Layer3 and Layer2 will start visible
https://maps.csr.ufmg.br/editor/?queryid=<query_id>&visiblelayers=-2
// Example of query in edit mode
// By setting 'visiblelayers=0', no Layer will start visible when the map loads
https://maps.csr.ufmg.br/editor/?queryid=<query_id>&visiblelayers=0
// Example of query in visualization mode
// By setting 'visiblelayers=custom', the Layers will start visible based on
// its 'visibility' property. Only if 'visibility: true', the Layer will start visible
https://maps.csr.ufmg.br/calculator/?queryid=<query_id>&visiblelayers=custom